Booklet Fundamentals
Creating a new Booklet
- Click the New Booklet button on the Project Ribbon tab.
- The new Booklet will be created and the Booklet editor opened to allow you to customize the default settings.
Creating a copy of an existing Booklet
- In the Project Explorer, select the Booklet Profile that you would like to create a copy of.
- Click the Clone button on the Project Explorer toolbar.
- The new Booklet will be created and opened for editing. It will have identical settings to the original booklet with a default unique name which you can edit to your preference.
Adding Topics to a Booklet
You can select which Topics to include in your Booklet on the Content page in the Booklet Editor. You have 2 choices for choosing which conceptual topics are included in a Booklet:
1. Include all Topics that are included in the Project Table of Contents
If you are producing a Booklet that you want to contain a similar set of Topics to the Table of Contents, in a similar structure, then this option makes the most sense. You can still easily selectively exclude certain topics by flagging them with the "Exclude from Booklet" Build Flag.
If you choose to base your Booklet content on the project Table of Contents, you can still add and arrange booklet specific node types such as Cover Pages, the Booklet Table of Contents page, Index Page on the project Table of Contents editor - those node types will only be used in the Booklet output.
2. Include only specific Topics
This option makes sense if you are producing booklets that contain a subset of all of your conceptual topics, or topics that you want arranged in a different order and structure to the main project Table of Contents.
On the Content page in the Booklet Profile Editor you can add, arrange and remove individual entries (Cover pages, Table of Contents, Index, Glossary and Topics) to include in the Booklet.
Inserting Page Break in Topic
- In Content Editor, place the cursor where you want to insert a page break.
- Open the Style Picker.
- In the Style Picker dock window, select Create a new Style Rule
 button.
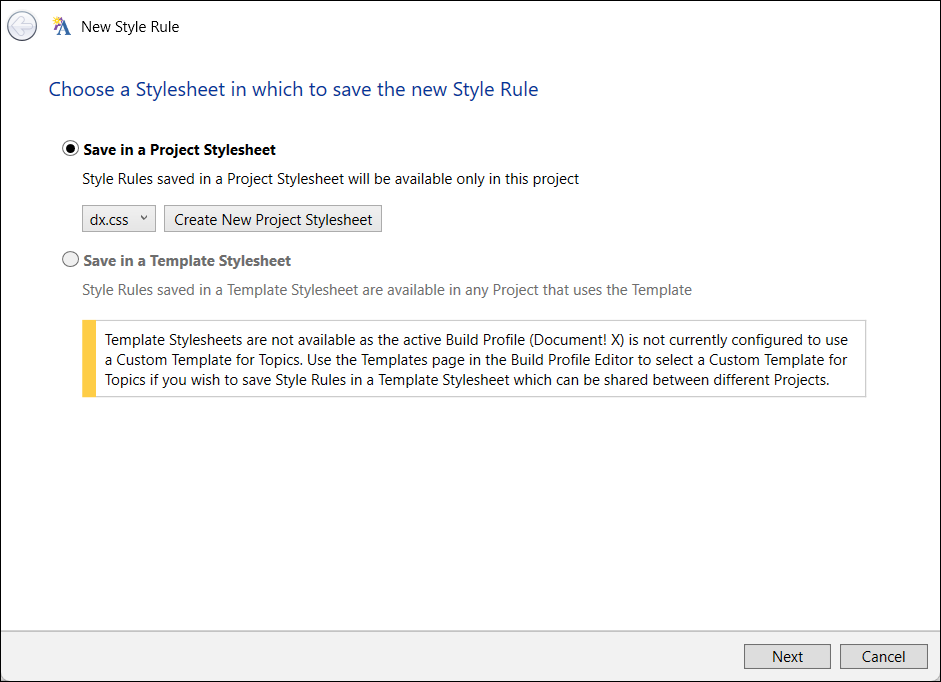
- In the New Style Rule dialog, select the stylesheet where you want to save the new style rule.
you can save it in the Project Stylesheet or the Template stylesheet.
- Select Next.
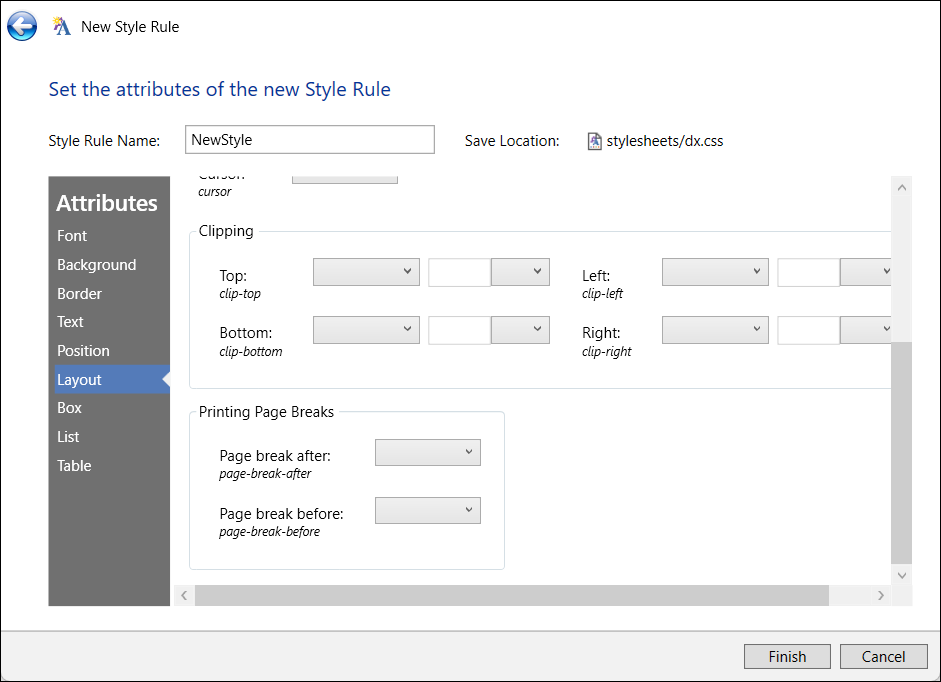
- Enter a name for the new style rule in the Style Rule Name field.
- Under Attributes, select Layout option.

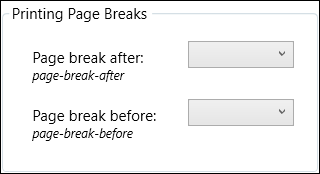
- In the Printing Page Breaks:

- Select Page break after as always (Insert page break after) to insert a page break after the cursor position.
- Select Page break before as always (Insert page break before) to insert a page break before the cursor position.
The new style rule is created and displayed in the Style Picker dock window.
Changing Booklet layout, style or other properties
You can find all of the available options for customizing the Booklet layout, style and content on the various Booklet Editor pages.
Properties
If you have defined Project Properties you can use this page to customize the values that will be used for those properties when building this Booklet.
Pdf Settings
Define the generated Pdf file name and to set document properties such as Subject, Author and Keywords.
Content
Select which Topics to include in this Booklet and how headings should be numbered.
Link Replacement
By default, most links in the generated Pdf are automatically converted to readable text. You can customize the default link conversion options on this page.
Page Layout
Page size, orientation and margins, as well as page breaking behavior.
Page Numbering
Choose on which page numbering should begin.
Viewer Options
Define the default viewer options (e.g. toolbar visibility, page layout) that will be effect when the generated Pdf is viewed.
Header and Footer
Define the contents of the Booklet header and footer.
Templates
Choose which template to use for this Booklet.
Widgets
Customize the default content of any defined widget for this Booklet.
Filtering
Define rules to govern which Topics are included in this Booklet. Rules can be defined that filter based on Build Flags and / or Item Names.
 Table of Contents
