 Table of Contents
Editing Customstyle CSS
When creating online documentation, having a good grasp of CSS can be a game-changer. It's like having a magical ability that can significantly transform your project's appearance, enhancing its style.
In this tutorial section, our focus will be on the most common and straightforward method to control the appearance of your project output by editing the customstyle CSS. While this tutorial lays the groundwork for styling, remember, there is a whole lot more to explore in the world of CSS.
When looking to tweak how your HTML page's appearance, the first step is identifying the HTML codes linked to its appearance. Before proceeding, make sure that you are familiar with the article on Inspection Tools available in all modern browsers.
Customizing Heading Font Color, Font Size, and Font Style
Imagine this: you are planning to change the color of all your headings, such as the heading, page title heading, and subheadings. Also, you want to give your headings a new look by changing the font style from normal to italic. Additionally, you want to increase the font size specifically for heading 1 according to project requirements. You can easily achieve above requirement using customstyle CSS instead.
To do that, follow the below steps:
- Go to the HTML output page of the project, the place where you want to make the above changes.
- Press F12 or Ctrl+Shift+I to open the developer tools pane for the HTML output page.
- Click on the arrow pointing the square icon next to the elements tab of the developer tools pane to activates inspect mode.
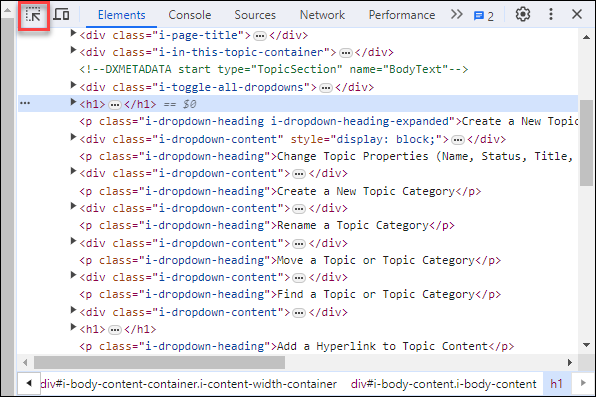
- Hover your mouse over heading 1, then click on it to view the related codes in the developer tool pane.
- Copy the related codes from the developer tool pane.
Copied Code from the existing HTML Output Page Copy Codeelement.style { } .i-page-title, h1, h2, h3, h4, .i-section-heading, .i-see-also-sub-heading { color: #222; } .i-page-title, h1, h2, h3, h4, h5, h6 .i-section-heading, .i-see-also-sub-heading { font-weight: 400; line-height: 1.3; text-rendering: optimizeLegibility; font-style: normal; } h1 { font-size: 1.538em; }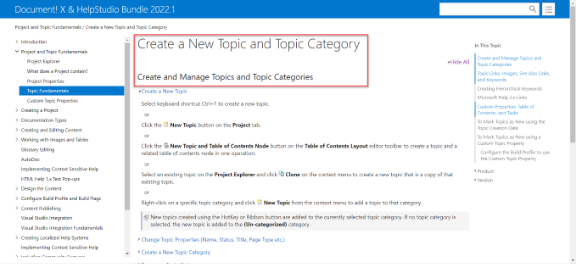
HTML Output Page before Customization
- Go to Project Explorer tab. From there, navigate to Other Files, then Stylesheets.
- Find the customstyle.css, right-click and select Edit option.
- Paste the code that you copied from the developer tool pane into the Source page.
Code for Customization Copy Codeelement.style { } .i-page-title, h1, h2, h3, h4, .i-section-heading, .i-see-also-sub-heading { color: #FF0000; } .i-page-title, h1, h2, h3, h4, h5, h6 .i-section-heading, .i-see-also-sub-heading { font-weight: 400; line-height: 1.3; text-rendering: optimizeLegibility; font-style: italic; } h1 { font-size: 3em; }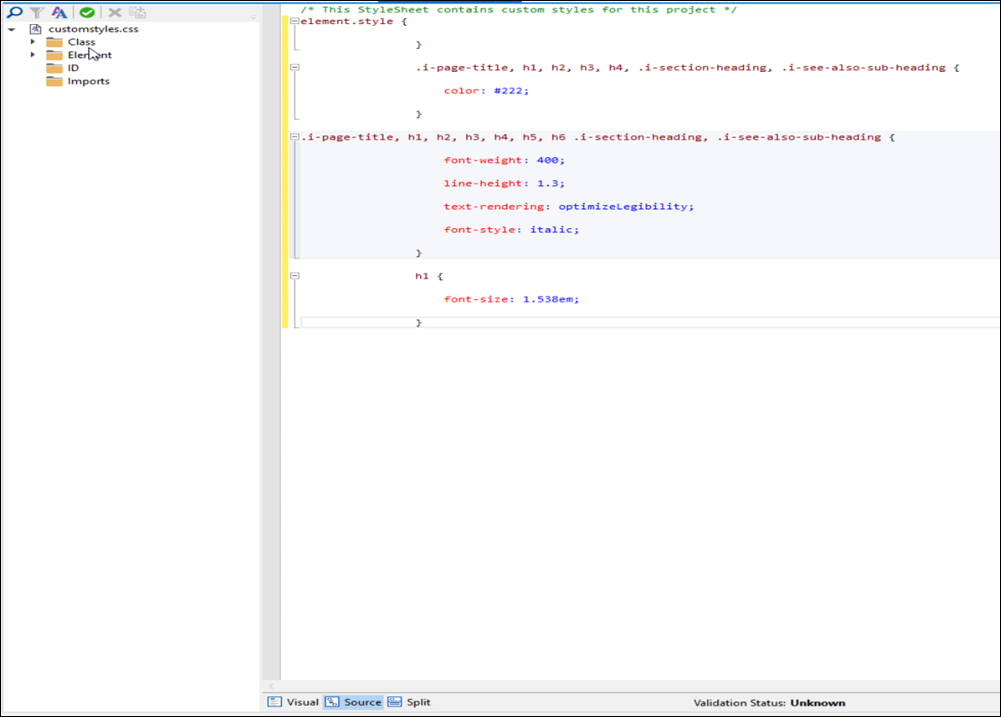
- In the Source page:
- Change the color code from #222 to #FF0000. This edit will switch the headings color from Black to Red.
- Change the heading 1 font-size from 1.538em to 3em. This edit will make the heading slightly larger than before.
- Change the font-style from normal to italic. This edit will change the font style of the heading from normal to italic.
- Save All (Ctrl+S).
- Go to Project Explorer tab, right-click on the build profile that you want to build.
- Select Build.
The build window opens with the selected build profile. - Select Start Build.
In the latest build output, you can see changes to the headings: they are now red, the font size has been increased, and the font style has been changed from normal to italic. This is achieved by editing the customstyle CSS, which overrides the other stylesheets in the project. You can implement various visual changes in the HTML output page by working on the customstyle CSS.
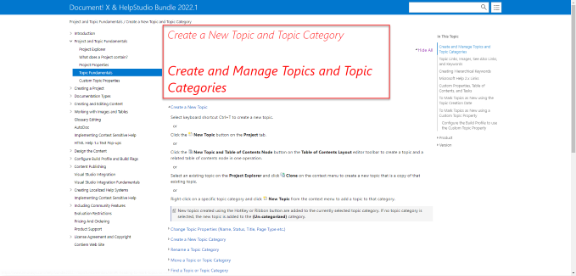
HTML Output Page after Customization
So, the above method provides you a straightforward approach to change the appearance of an HTML output page for your project.