 Table of Contents
Customizing Header and Footer for Booklet
Customizing Header
The header content is inherited from the documentation title added on the Settings page of the build profile. If you want to provide a specific input in the header section different from the documentation title, you need to customize the header.
For example, if you want to display the header text as "Test Documentation" in red color with a slightly increased font size, follow the steps below.
- Go to the build profile related to the booklet Project Explorer tab, right-click, and select Edit.
- Select Header and Footer option.
- Go to XHTML - Header tab and paste the below code.
You can also input the header information in the Design tab.
Example Code Copy Code<table style="border-bottom: 1px solid #000000; vertical-align: bottom; font-family: serif; font-size: 25pt; color: #FF0000;" width="100%" <tbody> <tr> <td style="text-align: right; font-weight: bold;" width="50%">Test Documentation</td> </tr> </tbody> </table>
Now, if you look into the Design tab, you see the updated header information displaying Test Documentation in red color with an increased font size. You can also preview the input in the Preview tab, which helps you make adjustments and observe real-time changes before finalizing the design.

Before Customization

After Customization
- Save All and build the booklet build profile to see the changes in the booklet.
Customizing Footer
The footer content is inherited from the template properties. If you want to use a specific text different from the template properties value, you need to customize the footer section.
We have customized the header content using code in the XHTML - Header tab. For the footer section customization, we will explore a simple method. To proceed:
- Go to the build profile related to the booklet in the Project Explorer tab, and then right-click, and select Edit.

- Select Properties option, and then select the ellipsis related to the FooterContent.
There, you can see the footer content value inherited from the template properties. - In the Edit - FooterContent input field, replace the existing text with the required footer content information.
- For example, change "My Company" to "ABC Limited" and select OK.
- Save All and build the booklet build profile to see the changes in the booklet.
In the below images, you can see the changes in the footer section of your booklet output.
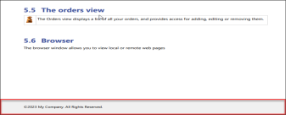
Before Customization
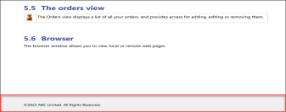
After Customization
Add Images in the Booklet Header and Footer
To add a custom image to the header or footer of your booklet, insert a <img> tag with the image source location into your XHTML code.
For example, if you want to display the header with an image, here’s how to do it in a few simple steps.
- First, ensure that the image you want to use in both the booklet's header and footer is available in the Project Explorer.
- Go to the build profile related to the booklet in the Project Explorer tab, and then right-click, and select Edit.
- Select Header and Footer option and go to XHTML - Header tab.
Make sure to clear the Different on Odd and Even pages checkbox if you do not want to differentiate the header and footer on the odd and even pages of your booklet.
- Add the image tag with the source location.
For example, consider adding the cyber secure logo image to the header section.Example Code Copy Code<div><img style="width: 100%" src="images/CyberSecure_Logo.jpg" /></div>
- Select Save All and repeat the same procedure for the Footer section by editing the XHTML - Footer tab.
By following the above simple steps you can effectively customize the header and footer of your booklet with the desired image.