Creating a Topic Category
Let us walk through the steps to create a new topic category:
- If you want to add a new topic category beneath an existing one, start by selecting the desired topic category in the Project Explorer.
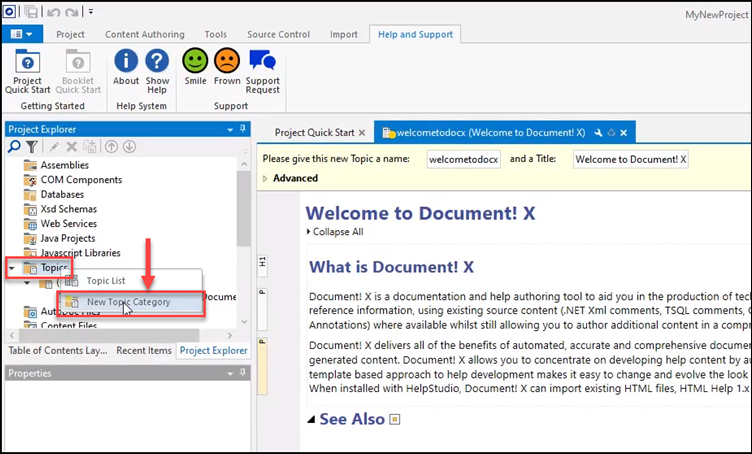
- Now right-click on the chosen topic category and from the context menu that appears, click on New Topic Category to add a new category.
While there are different ways to create a new topic category, right-clicking in the Content Explorer is the most efficient method. It allows you to specify the exact folder where you want to store the new topic category.

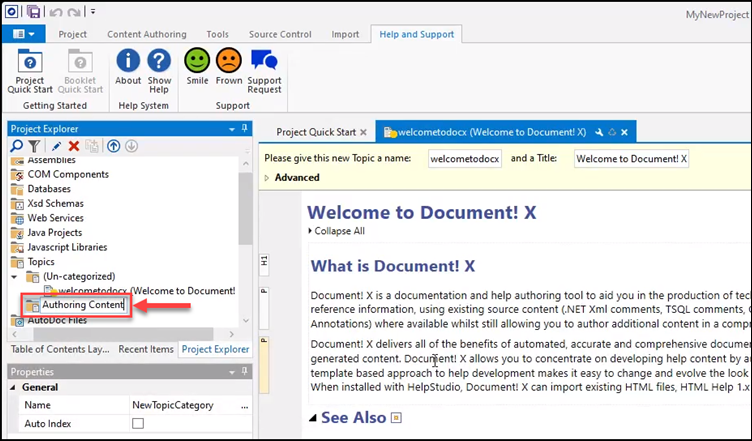
The new project explorer entry is now in edit mode, where you can change the name of the new topic category. -
Name the new Topic Category as Authoring Content and press Enter.
The Authoring Content topic category is created now. -
To finalize the creation of the Authoring Content topic category, select Save to update your project.
There you go! You've successfully created a new topic category in your project. Feel free to explore and customize further as you work on your content.
 Table of Contents
