Creating a New Widget
- On the Project tab, select Project Settings.
- On the Project Settings menu, under Content, select Widgets.
- Select
 Create a new Widget Type.
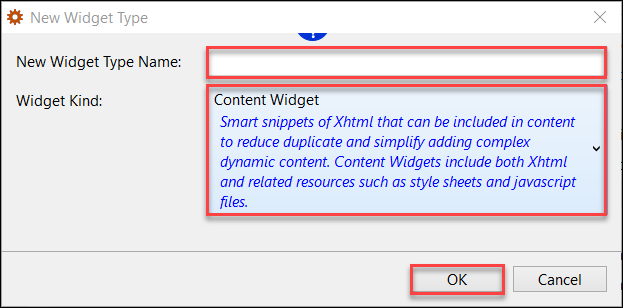
- On the New Widget Type dialog:

- Enter a name for New Widget Type Name.
- Select the Widget Kind based on your requirements.
- Select OK.
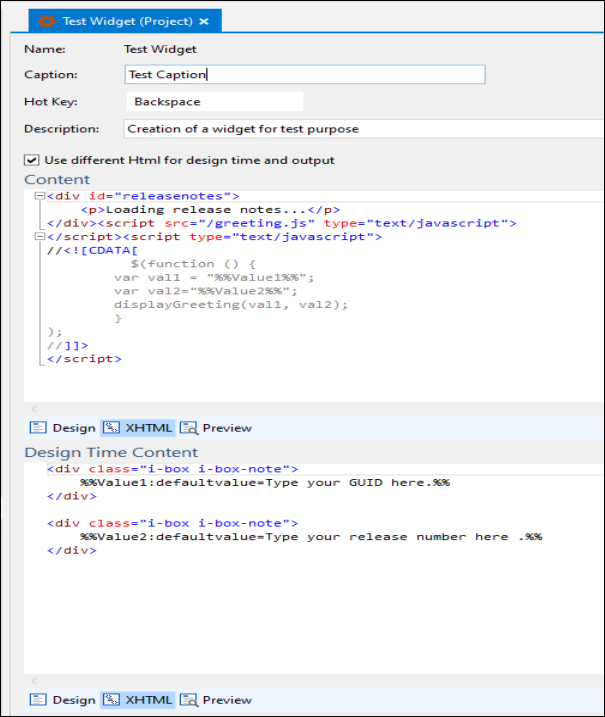
- On the Widget creation page:

- Enter a Caption and Description, and then assign a Hot Key for the newly created widget.
- Select Use different Html for design time and output checkbox.
- In the Design Time Content, select XHTML tab and enter the code related to the new widget you want to create.
Sample XHTML Code Copy Code<div class="i-box i-box-note"> Value1:defaultvalue=Type your GUID here. </div> <div class="i-box i-box-note"> Value2:defaultvalue=Type your release number here. </div>
- In the Content, select XHTML tab and enter the code related to the new widget you want to create.
Sample XHTML Code Copy Code<div id="releasenotes"> <p>Loading release notes...</p> </div> <script src="/greeting.js" type="text/javascript"> </script> <script type="text/javascript"> //<![CDATA[ $(function () { var val1 = "Value1"; var val2="Value2"; displayGreeting(val1, val2); } ); //]]> </script>
- In the Project Explorer, right-click Other Files, select Add existing Other File, and select the related JavaScript file for your new widget.

Sample JavaScript code Copy Codefunction displayGreeting(name, greeting) { alert("Hello " + name + ", " + greeting); } - Select Save All.
 Table of Contents
