 Table of Contents
Creating a New Help Studio Project from a Template
In this tutorial, we will create a new HelpStudio project from a template in HelpStudio. Let's get started:
- Start by launching the HelpStudio and look for the options related to initiating a new project.
- On the left side of your screen, you'll see a navigation panel and select New option.
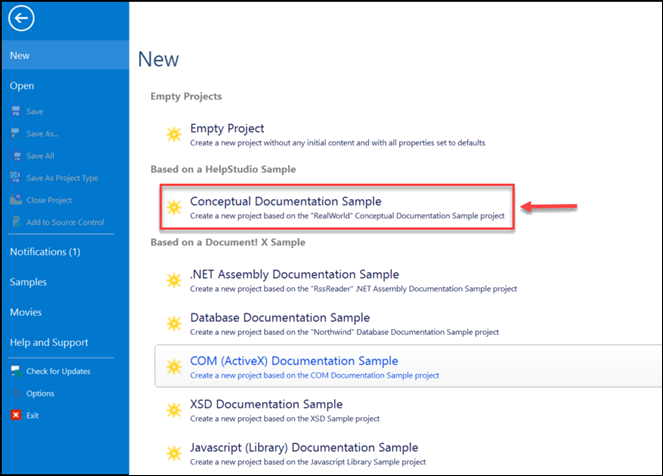
This will activate the New Project Wizard, offering various choices for your project.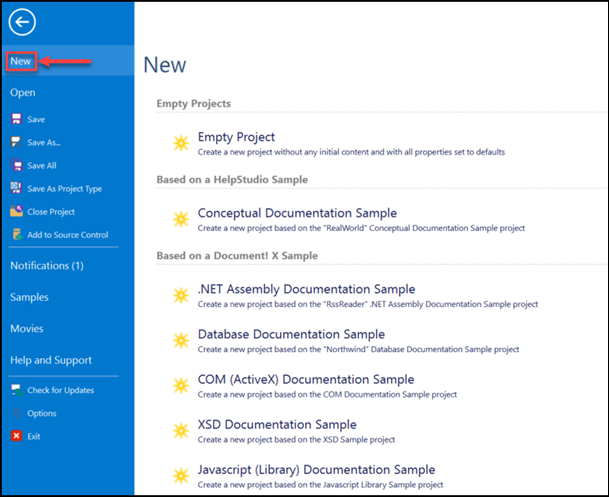
- In the New Project Wizard, select Conceptual Documentation Sample option from the HelpStudio sample. You will see a pop-up window appears for project creation.
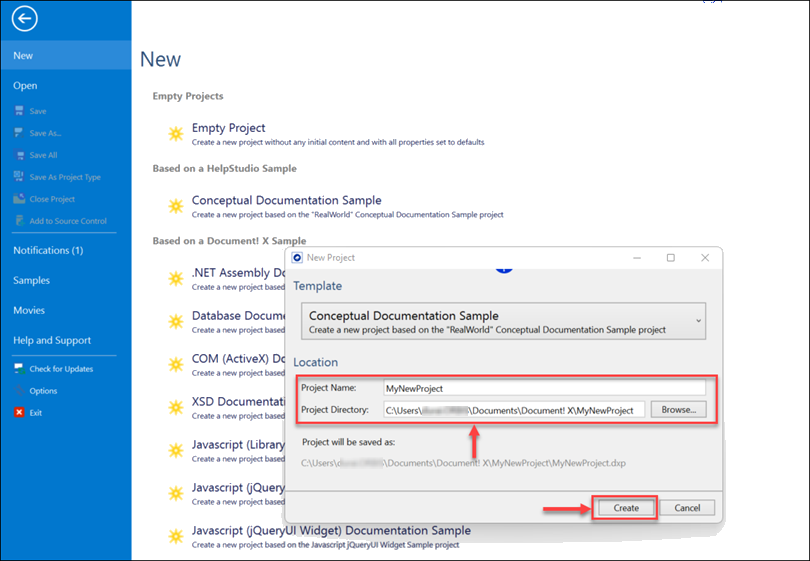
In the New Project window, you will find Project Name and Project Directory fields. - Name your project in the Project Name field as MyNewProject.
- If required, you can enter a specific location for your project in the "Project Directory" field. By default, projects are saved in the C:\Users\XXXX\Documents\XXXX directory.
- After setting up your project details, select Create button.
Now you will see a confirmation pop-up stating Folder does not exist will appear. - No worries! Select Yes to confirm the creation of your new project folder in the specified location.

You will be redirected to the newly created My New Project Explorer window based on the HelpStudio sample. In the Topics segment, you can create different categories, each capable of containing numerous associated topics.
Congratulations! You've successfully created a new HelpStudio project from a template and are ready to start building your content. Explore the various options within the "Project Explorer" window to enhance your project.